
Aligner attachments are small, tooth-colored composite resin bumps bonded directly to your teeth that act as handles, giving your aligners the grip they need to move teeth in ways a smooth plastic tray simply cannot accomplish on its own. If your orthodontist has mentioned them, here is what to expect: a placement appointment typically completed in about half an hour, minor tongue awareness for a few days, and a straightforward removal at the end of treatment that leaves your enamel intact.
The movements attachments make possible include:
- Rotation (spinning a tooth around its long axis)
- Intrusion (pressing a tooth deeper into the jaw)
- Extrusion (pulling a tooth further out of the gumline)
- Bodily translation (moving the entire tooth, root and crown together)
- Retention (keeping a tooth anchored while neighboring teeth move)
Not every aligner patient needs them. Simple spacing or mild crowding cases often proceed without a single attachment. Moderate to complex malocclusions almost always require them.
Table of Contents
- What are aligner attachments and why do orthodontists use them?
- What shapes do attachments come in, and what does each one do?
- How do attachments actually move teeth?
- What happens at the appointment when attachments are placed?
- What do attachments look and feel like day to day?
- Why do attachments fall off, and what should you do?
- How are attachments removed at the end of treatment?
- When might you not need attachments?
- How Starboarddental handles attachments for its patients
- Key Takeaways
- The part most patients don't hear before their first appointment
- Ready to start aligners at Starboarddental?
- Sources and further reading
What are aligner attachments and why do orthodontists use them?
The material is the same tooth-colored composite resin used in everyday dental fillings. Your orthodontist bonds these small shapes directly to the enamel surface, and they stay in place for the duration of your treatment. Once bonded, they create raised contact points that the aligner presses against, converting the tray's elastic force into a targeted push or pull on a specific part of the tooth.
Without attachments, a clear aligner can only apply relatively diffuse pressure across the crown. That works for mild tipping movements, but it falls short for rotations, extrusions, and bodily movements where precise force direction matters. A comprehensive review published in PubMed confirms that attachment morphology, quantity, and placement location all materially affect how efficiently a tooth moves and how predictably treatment progresses.
Cases that commonly require attachments include:
- Moderate to severe crowding with significant rotational corrections
- Teeth that need to be intruded or extruded (common in deep-bite or open-bite cases)
- Canine or premolar rotations greater than a moderate degree
- Bodily movement of posterior teeth
Simpler cases, such as mild spacing or minor front-tooth alignment, may proceed without any attachments at all. Your orthodontist determines necessity during treatment planning, not at the chair.
Statistic callout: Invisalign's manufacturer guidance describes attachments as handles that enable precise movements including rotation, intrusion, and extrusion — movements that a smooth aligner surface cannot reliably produce on its own.
Pro Tip: Before your first tray is delivered, ask your provider exactly how many attachments are planned, which teeth they'll be on, and what movement each one is driving. A good clinician can answer all three questions in under two minutes, and the answers tell you a lot about how complex your case actually is.
What shapes do attachments come in, and what does each one do?
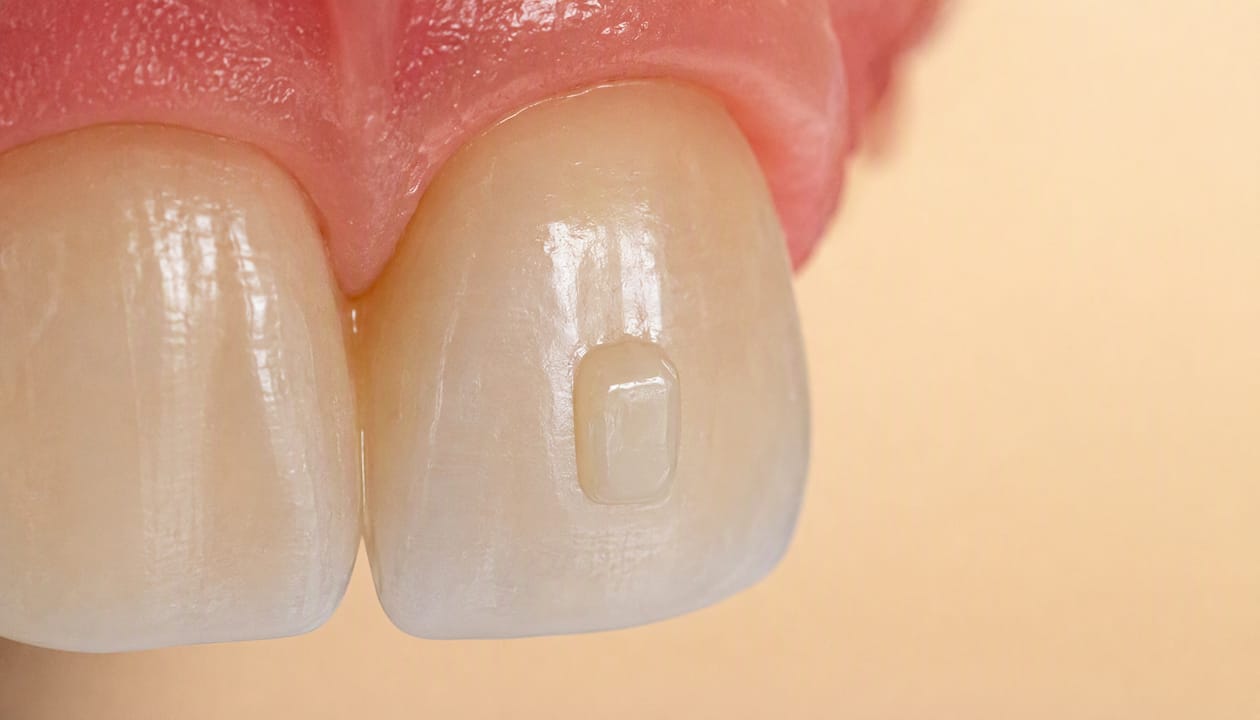
The geometry of an attachment is not arbitrary. Shape determines how force is distributed across the tooth surface, which movements are favored, and how much stress lands on the surrounding periodontal ligament and bone. Finite element analysis published in PLOS One compared five common shapes and found clear trade-offs between movement efficiency and localized biological stress.
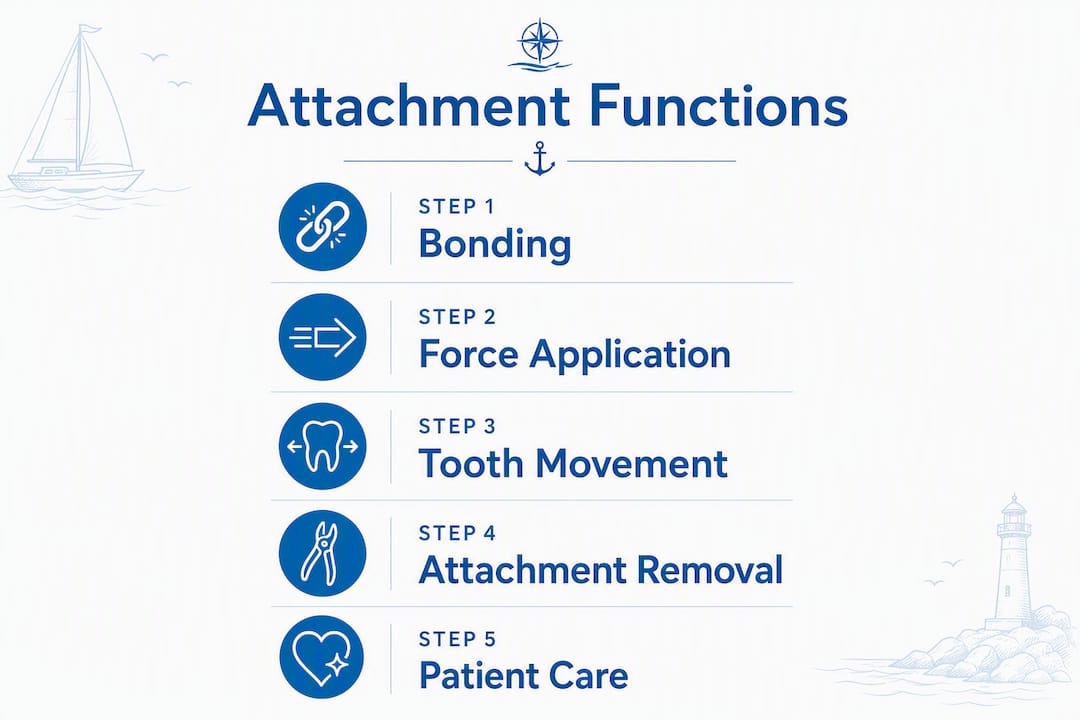
Invisalign markets its proprietary engineered shapes under the name SmartForce attachments (Align Technology). These are optimized, computer-designed geometries calculated from the planned tooth movement in the ClinCheck software. Generic or conventional attachments, used by other aligner systems, follow similar geometric principles but without the same degree of software integration.
Clinicians also distinguish between active and passive attachments. Active attachments are specifically shaped to engage the aligner and generate a force. Passive attachments primarily improve retention, keeping the tray seated without driving a specific movement.
| Shape | Primary movement strength | Biomechanical notes |
|---|---|---|
| Rectangular | Bodily translation, tipping control | High displacement; higher PDL and bone stress |
| Square | General retention, mild rotation | Balanced force distribution |
| Trapezoid | Rotation, torque | High displacement; elevated localized stress |
| Ellipsoidal/curved | Rotation with reduced strain | Lower stress; slightly less efficient movement |
| Semicircular | Retention, minor tipping | Lowest stress; used in lower-risk periodontal cases |
Dual attachments, placed on both the buccal (cheek-facing) and lingual (tongue-facing) surfaces of the same tooth, are reserved for movements requiring precise root control. They improve bodily translation and reduce unwanted tipping, though they also increase overall force complexity. Clinicians choose this configuration selectively, typically for posterior teeth needing significant bodily movement.
- Optimized attachments are pre-engineered by the software for a specific planned movement.
- Conventional attachments are placed by the clinician using standard shapes from a library.
- Precision cuts (notches in the aligner itself, not bonded shapes) are sometimes used alongside attachments for elastic hooks.
How do attachments actually move teeth?
A clear aligner works by applying pressure across the crown of a tooth. The problem is that a smooth tray surface contacts the tooth uniformly, which limits the direction and specificity of that force. An attachment changes the geometry of that contact point entirely.
Think of it this way: pressing your palm flat against a ball gives you limited control over which direction it rolls. Cup your fingers around it, and you can spin it, push it straight down, or lift it. Attachments are the fingers.
More precisely, an attachment creates a force vector — a direction of push or pull — that the aligner's elastic memory applies when it seats over the raised shape. The position of the attachment on the tooth (cervical third, middle third, or incisal third), combined with its geometry, determines whether the resulting force tips the crown, rotates the tooth, or moves the root and crown together.
"Attachment shape and configuration materially change displacement, stress, and strain in the periodontal ligament and surrounding bone. Flat shapes like rectangles and trapezoids yield higher crown displacement but higher PDL and bone stress, while curved shapes reduce stress but may be less efficient for rotation." — PLOS One FEA study
The clinical implication is real: a clinician managing a patient with early periodontal disease might deliberately choose a curved, lower-stress attachment shape even if it means slightly slower movement, to protect the supporting bone. Efficiency and biological safety are not always the same thing, and experienced clinicians weigh both.
Movements most dependent on attachment geometry:
- Rotation: Requires an off-center force; attachment position relative to the tooth's center of resistance is critical.
- Extrusion: Needs an attachment the aligner can hook under and pull; without one, aligners tend to skip over extruding teeth.
- Intrusion: Requires precise apical force; attachment placement in the middle or cervical third helps direct force toward the root apex.
- Bodily movement: Demands that crown and root move together; dual attachments or carefully positioned single attachments reduce the tipping tendency.
What happens at the appointment when attachments are placed?
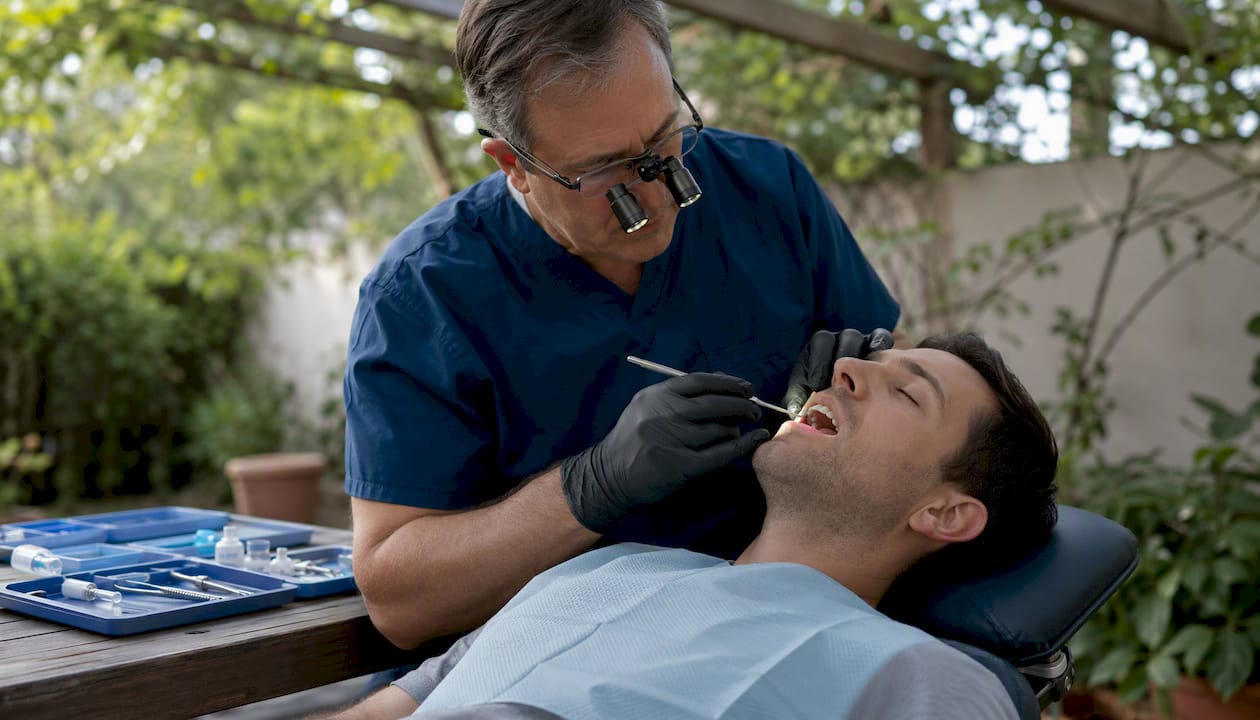
The placement visit is one of the more straightforward appointments in orthodontic treatment. Most patients are surprised by how quick and painless it is.
- Digital review. Your provider pulls up the ClinCheck or treatment plan to confirm attachment locations before touching your teeth. This is also your chance to ask questions.
- Tooth preparation. The teeth receiving attachments are cleaned and dried. A mild etching gel is applied to the enamel for a few seconds, then rinsed, to create a microscopically rough surface for the composite to grip.
- Bonding agent. A thin layer of bonding resin is applied and light-cured to prime the enamel surface.
- Template tray placement. A clear template tray, pre-loaded with composite resin in the exact attachment positions, is seated over your teeth.
- Curing. A dental curing light hardens the composite through the tray. This takes seconds per tooth.
- Tray removal and cleanup. The template is removed, and any excess composite around the attachment edges is trimmed and polished.
- Final check. Your provider seats your first aligner over the attachments to confirm fit and engagement.
The full procedure is generally completed in about 30 minutes, though a complex case with many attachments may take somewhat longer. There is no drilling, no anesthetic, and no recovery time. Some patients notice mild pressure when the first aligner seats over new attachments; that fades within a day or two.
Statistic callout: Placement is typically completed in about 30 minutes and involves no injections or drilling, making it one of the least invasive appointments in a full aligner treatment sequence.
Pro Tip: The most common reason attachments loosen early is behavioral, not clinical. Avoid opening packages with your teeth, biting fingernails, or chewing on pens. These habits apply off-axis force to the attachment base and can pop the bond before it has a chance to fully mature.
What do attachments look and feel like day to day?
Visibility
Attachments are color-matched to your tooth enamel using the same composite shades used in cosmetic bonding. On back teeth, they are nearly invisible. On front teeth, they are more noticeable up close, especially under bright lighting. Most patients stop thinking about them within a week. The aligners themselves sit over the attachments and further diffuse their appearance when the trays are in.
Tongue awareness and speech
Attachments are made from the same composite resin as tooth-colored fillings, and the raised surface is something your tongue notices immediately. This is normal. Most patients adapt within 3–7 days, and speech adjustments typically resolve within the first week. Practicing reading aloud for a few minutes each day speeds up adaptation noticeably.
Eating and aligner removal
Remove your aligners for every meal and snack. Eating with aligners in can crack the tray and dislodge attachments. When removing your trays, use a consistent technique: start from the back molars on one side, work forward, and avoid yanking from the front. Aligner removal tools (small plastic hooks) make this easier and reduce the torque on attachment bonds.
Hard foods are fine to eat once the tray is out, but biting directly into something very hard (a raw carrot, a crusty baguette) with the front teeth can stress attachment bonds. Cut food into smaller pieces when in doubt.
Cleaning your aligners and attachments
Daily care is straightforward:
- Rinse aligners with cool water every time you remove them.
- Brush aligners gently with a soft toothbrush and clear, unscented soap (not toothpaste, which is abrasive).
- Brush around each attachment with a soft-bristle brush after meals to prevent plaque buildup at the base.
- Floss daily, threading carefully around attachment edges.
For weekly deep cleaning, a soak of sufficient duration in cleaning crystals or a diluted hydrogen peroxide solution breaks down bacterial biofilm that daily brushing misses. This is the context behind the "30-minute rule" you may have heard: it refers to the upper end of a weekly soak, not a daily routine. Avoid hot water (it warps the plastic) and abrasive scrubbing (it micro-scratches the tray surface, making it cloudier over time). Standard guidance from aligner cleaning resources consistently recommends cleaning crystals or diluted peroxide soaks alongside gentle brushing.
Maintaining near-constant daily wear time remains the single most important compliance factor for treatment progress, regardless of how well you clean.
Pro Tip: Pack a small travel kit in your bag or desk: a soft travel toothbrush, a small container of floss picks, and your clinic's phone number. If an attachment comes off while you are out, you will want to call promptly rather than wait until you get home.
Why do attachments fall off, and what should you do?
Attachment loss is not rare. It happens across all aligner systems and to patients who are doing everything right. The bond between composite and enamel is strong, but it is not indestructible.
Common causes include:
- Biting hard objects or using teeth as tools (the most preventable cause)
- Contamination of the enamel surface at the time of bonding (saliva or blood contact before curing)
- Trauma from aligner insertion or removal using improper technique
- Placement on a tooth with limited enamel surface area (short clinical crowns)
- Normal wear over a long treatment course
What to do immediately if an attachment comes off:
- Keep wearing your current tray. Continuing tray wear helps prevent regression while the attachment is replaced, because the tray still maintains some positional pressure on the tooth.
- Call your provider to schedule a repair. This is usually a quick appointment, similar in length to the original placement.
- Do not force the tray if it no longer seats properly without the attachment. If it feels significantly off, contact your provider before advancing to the next tray.
- Swallowing a small composite piece is not dangerous, but save it if you can for your provider to inspect.
Can you continue wearing your tray if an attachment falls off? Generally yes, and you should. The tray still applies some force, and keeping it in prevents the tooth from drifting. The missing attachment pauses the specific programmed movement for that tooth, but it does not undo what has already been achieved. Your provider will replace it and, if needed, extend that stage of treatment.
A lost attachment is rarely urgent. The exception is if you are in the middle of a critical movement stage (a significant rotation or extrusion) and the attachment was the primary driver. In that case, call your provider the same day rather than waiting for a routine slot.
How are attachments removed at the end of treatment?
Removal is even simpler than placement. Your provider uses a fine polishing bur or a composite removal instrument to gently buff the attachment off the enamel surface. There is no drilling into the tooth itself. The composite sits on top of the enamel, and a trained clinician removes it without touching the underlying tooth structure.
What patients typically notice:
- No pain during removal (no anesthetic needed in most cases)
- Immediate smoothness where the attachment was
- Occasional mild sensitivity for a day or two, which resolves on its own
- Slight surface texture differences that polishing addresses
Properly performed removal does not damage enamel when carried out by a trained clinician using appropriate instruments. The concern about enamel damage is legitimate if removal is rushed or done with the wrong tool, which is why you should never attempt to remove an attachment yourself.
After removal, your provider will typically take final scans for your retainer fabrication, perform a routine polish, and may apply a fluoride treatment if any sensitivity is present. The retainer scan is important: your teeth are now in their final planned position, and the retainer is made from that exact shape.
Pro Tip: Ask your provider at your final attachment-removal appointment whether a new scan is being taken that day or at a separate visit. Retainer fabrication timelines vary by lab, and knowing the schedule helps you plan so you are not without a retainer for longer than necessary.
When might you not need attachments?
Not every aligner case requires them. Whether attachments are necessary depends on the specific malocclusion and the movements planned in the treatment design. Cases that often proceed without attachments include:
- Very mild crowding or spacing with no significant rotational component
- Relapse cases where teeth have only shifted slightly from a previous correction
- Cases limited to anterior alignment with no intrusion, extrusion, or bodily movement goals
- Patients with very short clinical crowns where bonding surface is insufficient
When attachments are not used, or when they are not enough on their own, clinicians have other tools:
- Interproximal reduction (IPR): Removing a small amount of enamel between teeth to create space, reducing the need for complex rotational movements.
- Elastics: Rubber bands attached to precision cuts or buttons on the aligner to generate inter-arch forces (useful for correcting bite relationships).
- Buttons: Small bonded handles used with elastics, similar in concept to attachments but designed specifically for elastic attachment rather than aligner engagement.
- Temporary anchorage devices (TADs): Tiny titanium screws placed in the bone by a specialist to provide absolute anchorage for difficult movements; used in complex cases, not routine aligner treatment.
A practical question to ask your orthodontist: "Is an attachment the only way to move this tooth, or could IPR or elastics accomplish the same goal?" A clinician who has thought through your case will have a clear answer.
How Starboarddental handles attachments for its patients
At Starboarddental in Kennebunk, attachment planning starts with a digital scan, not an impression tray. The scan feeds directly into the treatment planning software, so attachment locations are mapped to the exact geometry of your teeth before anything is bonded.
What patients can expect at the practice:
- A digital treatment preview before placement so you can see where attachments will sit
- Placement completed in a single visit of about 30 minutes with no injections
- Focused hygiene instruction specific to brushing and flossing around your attachments
- Prompt repair appointments if an attachment comes off during treatment
- Ceiling-mounted TVs and comfort amenities during the placement visit to keep the experience relaxed
Starboarddental places attachments only where the treatment plan clinically requires them. The goal is always the minimum number needed to achieve the planned movements, which keeps visibility low and simplifies your daily care routine.
Pro Tip: At your consultation, ask whether your treatment plan includes SmartForce-style optimized attachments or conventional shapes. The answer tells you how precisely your movements have been engineered and gives you a basis for comparing treatment options.
For questions about insurance coverage, visit logistics, or what to bring to your first appointment, contact the practice directly — the team can walk you through specifics before you commit to anything.
Key Takeaways
Aligner attachments are tooth-colored composite handles bonded to enamel that give clear aligners the mechanical grip needed to rotate, intrude, extrude, and bodily move teeth with precision.
| Point | Details |
|---|---|
| What attachments do | They act as handles that let aligners apply targeted forces for complex movements like rotation, extrusion, and intrusion. |
| Placement appointment | The procedure takes about 30 minutes, requires no injections, and is non-invasive. |
| Adaptation timeline | Tongue awareness and minor speech changes typically resolve within 3–7 days of placement. |
| If one falls off | Keep wearing your current tray and call your provider promptly; the movement pauses but does not reverse. |
| Starboarddental approach | Starboarddental uses digital scans and individualized planning to place attachments only where clinically necessary, with same-visit hygiene instruction and prompt repair support. |
The part most patients don't hear before their first appointment
Attachments get described as a minor detail in most aligner consultations. They are not. They are the mechanism that separates what a clear aligner can do from what it actually does for your specific case. When a clinician tells you your case is "straightforward," part of what they mean is that the movements planned do not require much attachment engineering. When the case is complex, the attachment plan is where most of the clinical thinking lives.
What I find patients consistently underestimate is the relationship between attachment geometry and biological risk. Choosing a more efficient shape is not always the right call. A rectangular attachment on a tooth with compromised periodontal support generates more stress on the surrounding bone than a curved one, even if it moves the tooth faster. Good attachment planning is not just about speed. It is about matching the force to what the tooth and its supporting structures can safely handle.
The other thing worth saying plainly: visibility concerns are real but usually short-lived. Front-tooth attachments are noticeable up close, and no amount of reassurance changes that in the first week. What changes is your own perception. After a few days, patients stop seeing them in the mirror. After a few weeks, they forget they are there. The composite is color-matched, the aligners sit over them, and the human brain is remarkably good at filtering out things it has decided are not worth tracking.
If you are weighing whether to start aligner treatment and attachments are the sticking point, the honest answer is: they are a temporary inconvenience in service of a permanent result.
Ready to start aligners at Starboarddental?
Starboarddental offers clear aligner treatment in Kennebunk with digital scanning, individualized attachment planning, and a team that walks you through every step before it happens. The difference from a generic aligner experience is the level of clinical detail at the planning stage: your attachments are mapped to your specific tooth geometry, not a template, and your hygiene routine is tailored to your attachment locations from day one.

New patients can book a consultation to get a digital scan, a treatment preview, and a clear picture of what your attachment plan would look like before committing to treatment. If you have questions about what your insurance covers or what to bring to your first visit, the new patient page has the logistics, and the front desk team can answer specifics by phone. Book your consultation today and leave with a plan, not just a brochure.
Sources and further reading
The claims in this article draw from peer-reviewed clinical evidence and manufacturer guidance. The table below identifies each source type so you can assess the evidence level directly.
| Source | Type | What it covers |
|---|---|---|
| Clear Aligner Attachments: A Comprehensive Review (PubMed) | Peer-reviewed clinical review | Attachment morphology, movement efficiency, and clinical outcomes |
| Effects of Attachment Designs on Clear Aligner Tooth Movement (PLOS One) | Peer-reviewed finite element analysis | Shape trade-offs: displacement, PDL stress, bone strain |
| Attachments for Orthodontic Aligner Treatment: Systematic Review (PMC) | Peer-reviewed systematic review | Shape, placement, bonding evidence across multiple databases |
| Cleaning and Disinfection Protocols for Clear Aligners (PMC) | Peer-reviewed systematic review | Biofilm, oral health risks, and cleaning protocol evidence |
| Invisalign Attachments (Invisalign.com) | Manufacturer guidance | SmartForce attachment purpose, patient-facing description |
| Aligner Wear Time and Cleaning Guidance | Clinical patient guidance | 20–22 hour wear compliance; 15–30 minute weekly soak |
| How to Clean Aligners (DentalReviewed) | Clinical patient guidance | Daily and weekly cleaning routines; product recommendations |
| What to Do If an Attachment Falls Off | Clinical patient guidance | Immediate steps, urgency assessment, tray-wear guidance |
| Removing Attachments Properly | Clinical patient guidance | Non-invasive removal, enamel safety, post-removal care |
Manufacturer guidance reflects the clinical intent of proprietary systems (Invisalign SmartForce) and should be read alongside peer-reviewed evidence, which provides independent verification of biomechanical claims. For questions about your specific case, consult a licensed orthodontist or dentist.
This article is general educational information, not professional dental or medical advice. Confirm current treatment recommendations and clinical protocols with a licensed dental provider.